
시작하기전 참고!!
1. 전자정부프레임워크 V4.0.0 공통기술 서비스 - 사용자 지원 - 온라인참여 - 설문조사v4.0.0 을 바탕으로 진행함
2. MySQL 기준으로 설명
3. https://www.egovframe.go.kr/wiki/doku.php?id=egovframework:rte2:fdl:crypto_simplify_v3_8 를 나에게 맞게 쉽게 풀어서 설명한것 뿐임

일단 설문조사v4.0.0 ZIP 파일을 받아서 import 함
(나는 여기서 import가 안되었는데 혹시 안되는 분이 있다면 여기(https://qpwlqp123.tistory.com/162) 참고!)
표준프레임워크 3.8 부터 ARIA 블록암호 알고리즘 기반 암/복호화 설정을 간소화 할 수 있는 방법을 제공한다.

프로젝트 import 까지 마쳤으면 시작해보자!
1. EgovEnvCryptoAlgorithmCreateTest.java 파일을 만들어준다
EgovEnvCryptoAlgorithmCreateTest.java
package egovframework;

import org.egovframe.rte.fdl.cryptography.EgovPasswordEncoder;
import org.slf4j.Logger;
import org.slf4j.LoggerFactory;

public class EgovEnvCryptoAlgorithmCreateTest {

	private static final Logger LOGGER = LoggerFactory.getLogger(EgovEnvCryptoAlgorithmCreateTest.class);

	//계정암호화키 키
	public String algorithmKey = "(사용자정의 값)";

	//계정암호화 알고리즘(MD5, SHA-1, SHA-256)
	public String algorithm = "SHA-256";

	//계정암호화키 블럭사이즈
	public int algorithmBlockSize = 1024;

	public static void main(String[] args) {
		EgovEnvCryptoAlgorithmCreateTest cryptoTest = new EgovEnvCryptoAlgorithmCreateTest();

		EgovPasswordEncoder egovPasswordEncoder = new EgovPasswordEncoder();
		egovPasswordEncoder.setAlgorithm(cryptoTest.algorithm);

		LOGGER.info("------------------------------------------------------");
		LOGGER.info("알고리즘(algorithm) : "+cryptoTest.algorithm);
		LOGGER.info("알고리즘 키(algorithmKey) : "+cryptoTest.algorithmKey);
		LOGGER.info("알고리즘 키 Hash(algorithmKeyHash) : "+egovPasswordEncoder.encryptPassword(cryptoTest.algorithmKey));
		LOGGER.info("알고리즘 블럭사이즈(algorithmBlockSize)  :"+cryptoTest.algorithmBlockSize);
		/*gdyYs/IZqY86VcWhT8emCYfqY1ahw2vtLG+/FzNqtrQ=*/

	}

}
1-1) public String algorithmKey = "(사용자정의 값)"; => public String algorithmKey = "egovframe"; 로 수정
- 꼭 egovframe 이라고 써야하는건 아니다. 예시이다.
1-2) 혹시나 import에 빨간줄이 끄인다면 경로가 다른것 뿐이니 import를 지우고 import 해야하는 클래스등에서 다시 import 해주면 됌
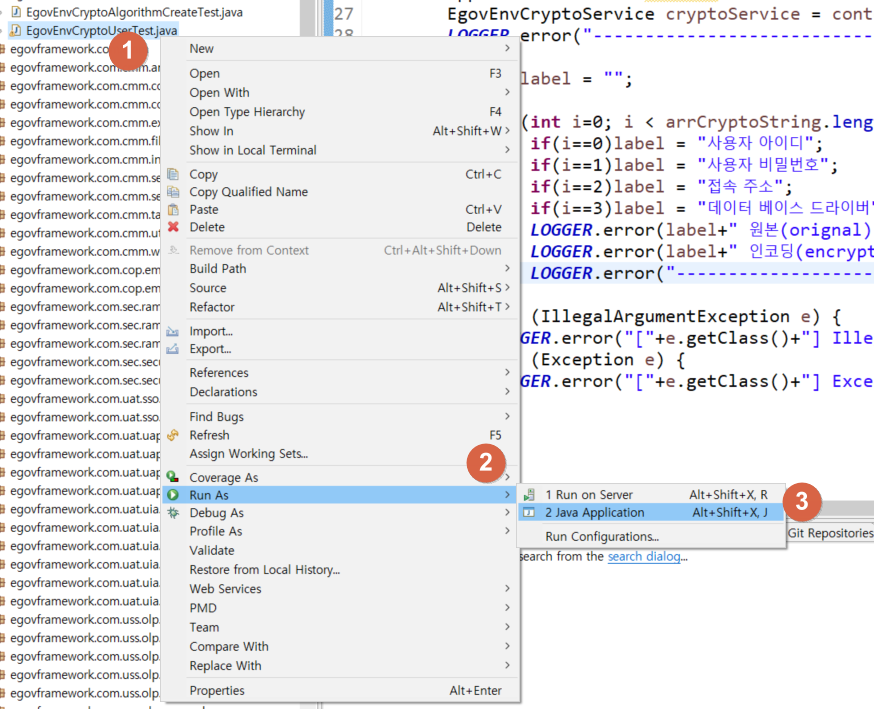
1-3) 이제 실행을 해줄건데 아래 그림을 따라하면 된다.

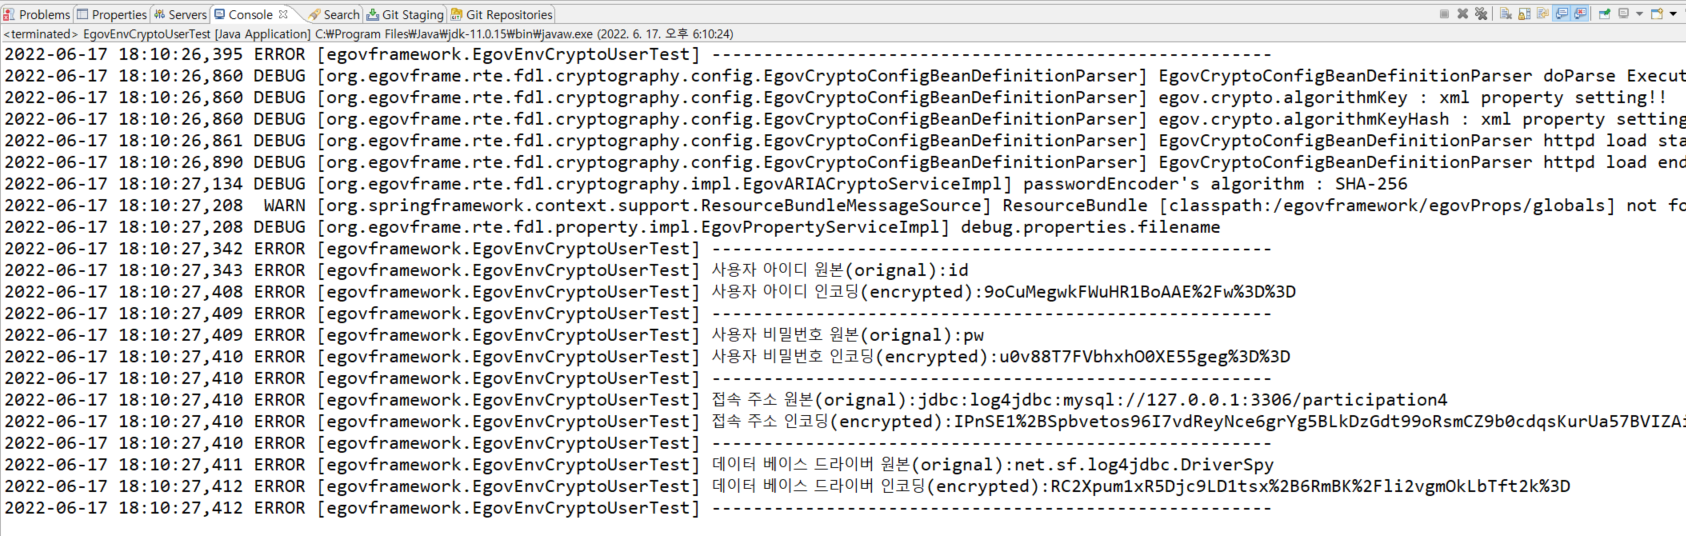
그럼 콘솔에 아래와 같은 문구들이 보일것이다.

혹시나! 아무것도 나오지 않는다면 LOGGER.info => LOGGER.error 로 바꿔서 다시 해보길 바란다.
잘 나왔으면 알고리즘 키 Hash 값을 다른곳에 잘 적어둔다!
gdyYs/IZqY86VcWhT8emCYfqY1ahw2vtLG+/FzNqtrQ=
2. 알고리즘 키 Hash 값 입력하기!
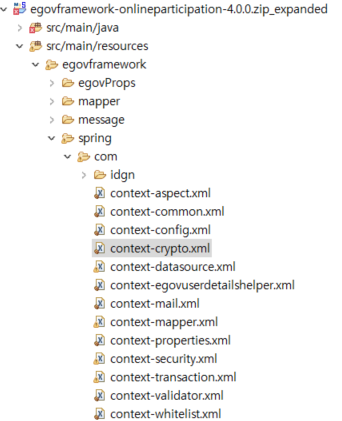
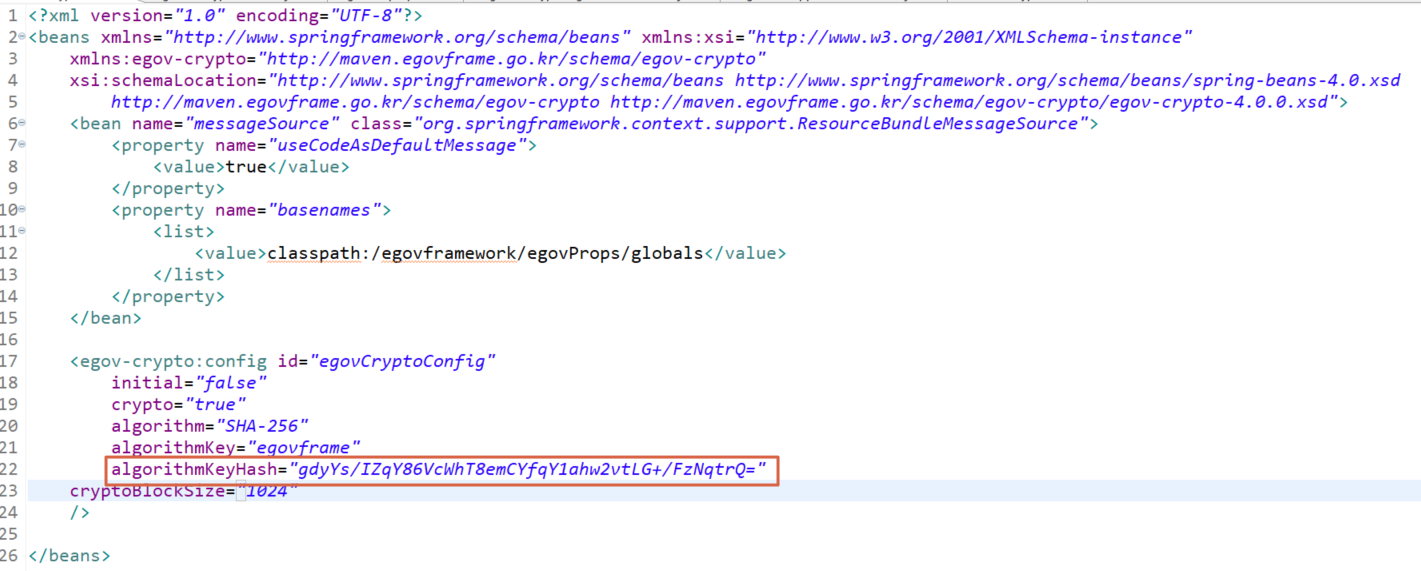
여기 파일에 이렇게 Hash 값을 입력하면 된다!
3. EgovEnvCryptoUserTest.java 파일 만들기!

위치는 아까 EgovEnvCryptoAlgorithmCreateTest.java 파일 위치와 동일하고 내용은 아래와 같다.
package egovframework;
// 데이터베이스 연결 항목(Url, UserName, Password) 인코딩 값 생성 JAVA
import org.slf4j.Logger;
import org.slf4j.LoggerFactory;
import org.springframework.context.ApplicationContext;
import org.springframework.context.support.ClassPathXmlApplicationContext;

import org.egovframe.rte.fdl.cryptography.EgovEnvCryptoService;
import org.egovframe.rte.fdl.cryptography.impl.EgovEnvCryptoServiceImpl;

public class EgovEnvCryptoUserTest {

	private static final Logger LOGGER = LoggerFactory.getLogger(EgovEnvCryptoUserTest.class);

	public static void main(String[] args) {

		String[] arrCryptoString = {
		"id",   //데이터베이스 접속 계정 설정
		"pw",   //데이터베이스 접속 패드워드 설정
		"jdbc:log4jdbc:mysql://127.0.0.1:3306/participation4", //데이터베이스 접속 주소 설정
		"net.sf.log4jdbc.DriverSpy"  //데이터베이스 드라이버
		};


		LOGGER.error("------------------------------------------------------");
		ApplicationContext context = new ClassPathXmlApplicationContext(new String[]{"classpath:/egovframework/spring/com/context-crypto.xml"});
		EgovEnvCryptoService cryptoService = context.getBean(EgovEnvCryptoServiceImpl.class);
		LOGGER.error("------------------------------------------------------");

		String label = "";
		try {
			for(int i=0; i < arrCryptoString.length; i++) {
				if(i==0)label = "사용자 아이디";
				if(i==1)label = "사용자 비밀번호";
				if(i==2)label = "접속 주소";
				if(i==3)label = "데이터 베이스 드라이버";
				LOGGER.error(label+" 원본(orignal):" + arrCryptoString[i]);
				LOGGER.error(label+" 인코딩(encrypted):" + cryptoService.encrypt(arrCryptoString[i]));
				LOGGER.error("------------------------------------------------------");
			}
		} catch (IllegalArgumentException e) {
			LOGGER.error("["+e.getClass()+"] IllegalArgumentException : " + e.getMessage());
		} catch (Exception e) {
			LOGGER.error("["+e.getClass()+"] Exception : " + e.getMessage());
		}

	}

}
주석처럼 데이터베이스 접속 계정 설정, 데이터베이스 접속 패드워드 설정, 데이터베이스 접속 주소 설정, 데이터베이스 드라이버 를 각자에게 맞게 적어주면 된다.
그리고 아까와 똑같이 실행시켜주면 Console 창에 암호화된 내용이 뜰것이다.
완~성! globals.properties에 복붙만 해주면 끝이다.
나도 오늘 하루 종~~일 못했는데 https://webobj.tistory.com/75 이분꺼 보고 겨우 해결..
감사합니다~~
(혹시나해서 3.9.0버전으로 해봤는데 또 잘 안되네... 해결되면 추가로 올릴예정.... ㅠㅠ)
'전자정부프레임워크' 카테고리의 다른 글
| Spring 프로젝트 폴더 구조 정리 (0) | 2022.06.17 |
|---|
